

Hello, and thank you for checking out SlideTrax!
SlideTrax allows you to effortlessly create a video from any audio file, so you can upload it to YouTube or other video sharing sites. Band tracks, speeches, lectures, nature recordings ? any type of audio file ? can easily be turned into a video file. This makes publishing audio tracks to the cloud a breeze, so you can take advantage of all the free cloud disk space available out there, and send video links with your audio to anyone in the world!
First, let?s start with a couple of quick definitions:
? SlideTrax = The Product that creates a SlideTrak
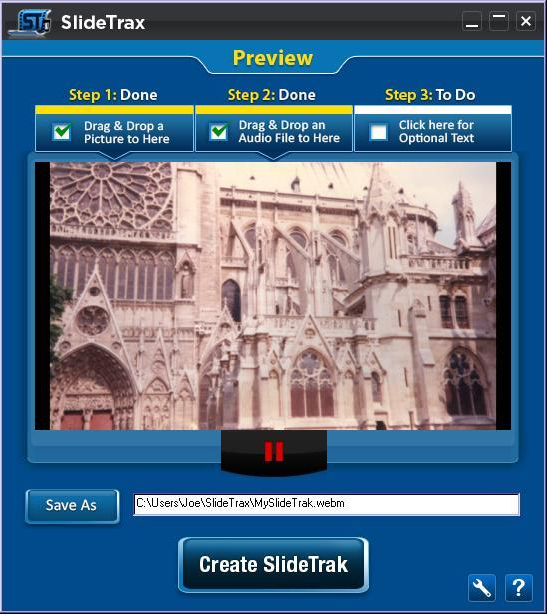
At the top are three To Do buttons, which also act as guides about what needs to be done:

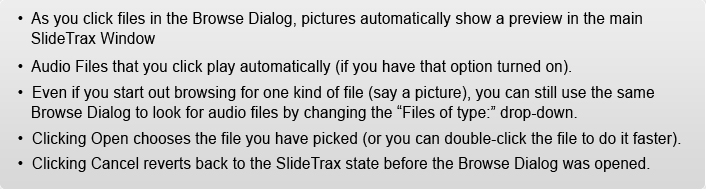
To choose a file, all you need to do is locate it on your computer, drag it over to SlideTrax, and drop it there. As you drag a file to SlideTrax, pictures are automatically previewed, and Audio Files are automatically played (if that option is turned on).

The only thing that?s really needed to create a SlideTrak is an audio file. This allows you to create a blank SlideTrak (video) that plays your audio track. If you add a picture (image) too, you will get a SlideTrak with your picture and your audio track.
You can also add optional text, which is on top of your picture (or the blank area). We?ll get into that in the Details Section.
Once the minimum requirement has been satisfied (an audio file has been selected), the Create SlideTrak button becomes active, and you can click it to create your SlideTrak video.
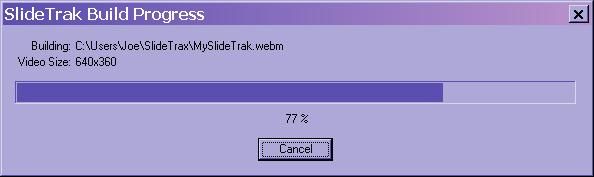
When you click the Create SlideTrak button, a Window pops up that shows you the build progress.
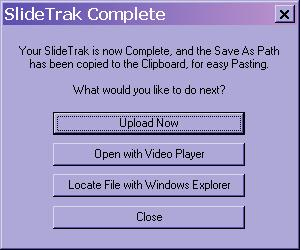
When the SlideTrak has been created, one last Window pops up, giving you options for what to do next.
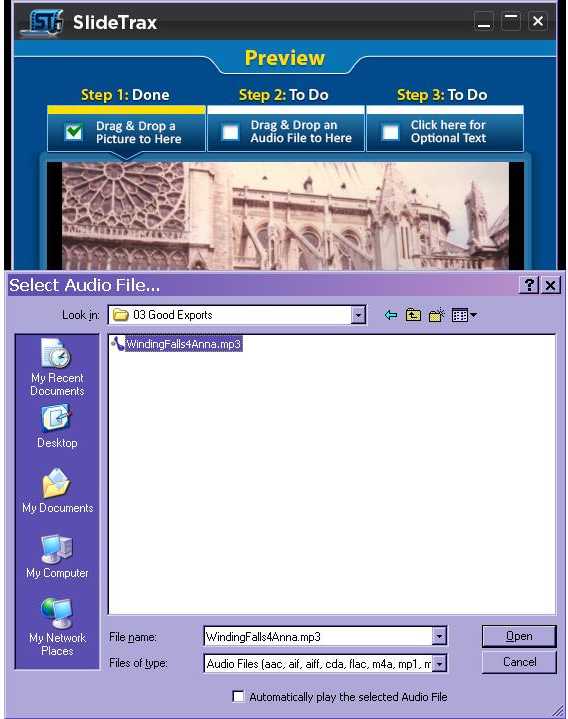
For even more flexibility, if a file has not been selected, you can click the Step 1 or Step 2 button to Browse for a File (instead of using Drag & Drop). Here is a screen shot that shows the user browsing for an Audio File:
 If a file has already been picked, clicking the Step 1 or Step 2 button deselects it, so you can browse for another file. Regardless of whether or not a file has been chosed, Dragging and Dropping a file always selectss the new one.
Some notes about using the Browse for File feature:
Once an audio file has been selected, the Create SlideTrak button becomes active, and you can click it to create your SlideTrak video.
Adding Text
If you like, you can also place optional text on top of your SlideTrak. Click the Step 3 button to open the Text Dialog Window, as seen below.

Simply type the desired text in the SlideTrax Text area, and it will be seen live over your SlideTrak.
The Font Drop-down allows you to easily browse all the fonts on your system. As you highlight different fonts, your text is shown with that font.
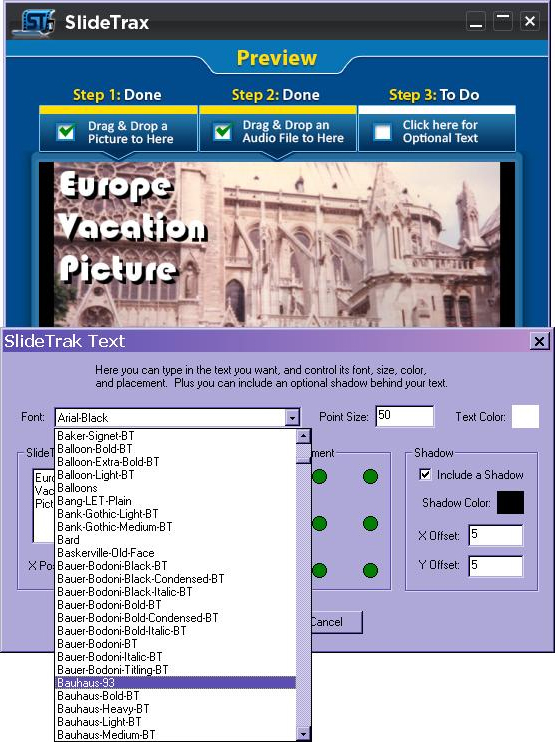
Here are the other Text options:
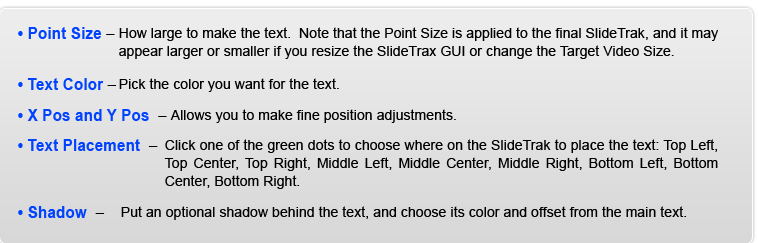
When you are done with the SlideTrak Text dialog, click OK to keep the text settings, or Cancel to continue without text. If you click OK, and later turn text off (by clicking button 3), the current text settings will be remembered.
Playbutton
When an audio file has been selected, you can easily play it by clicking the Play button. While playing, it becomes a Pause button, so you can pause playback. If you right-click it, there are two more options: Restart Playback ? Play from the beginning, and Stop ? Stop playback.
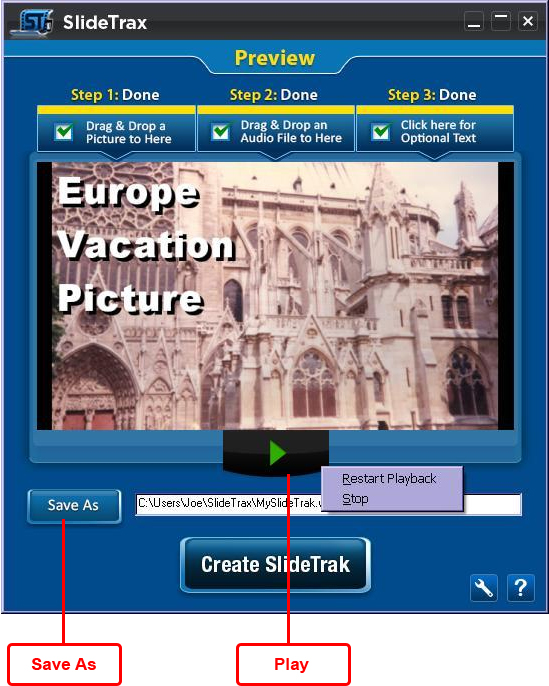
Save as
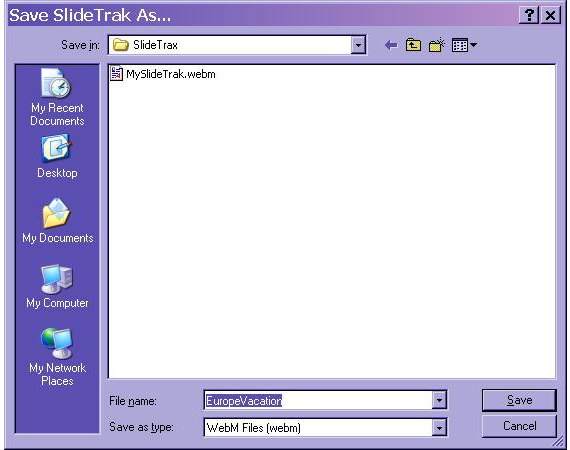
If you want to change where your SlideTrak is saved, click the Save As button. This will pop up a Save SlideTrak As? dialog box, which you can use to save your SlideTrak in a different location on your computer.
Target Video Size
Your SlideTrak video can be creatged at different sizes for times when you want a higher (or lower) resolution SlideTrak. This offers more flexibility in how the world sees it, i.e. higher resolution generally means more clarity when viewing, expecially at full screen, but usually requires more disk space.
To change the size, simply right click over the picture area, and select a different size in the menu that appears.
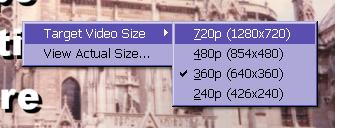
Note that with higher resolutions, the SlideTrak build time may increase.
Under the same menu, you can click View Actual Size to preview what your SlideTrak looks like at the actual size that was chosen. This pops up in a separate view window. If you have text on your SlideTrak, it will be seen at the true text point size in use.
Options
Click the Options button to open a dialog that lets you change the default SlideTrax options.
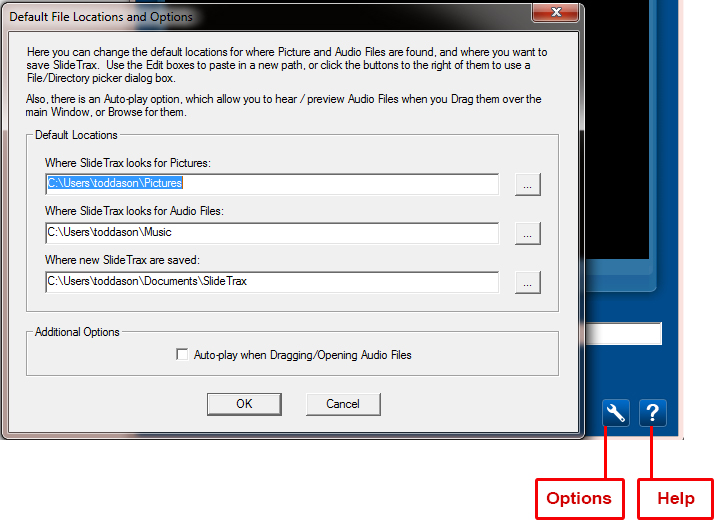
Under Default Locations, you can change where SlideTrax looks for Pictures, Audio Files, and where SlideTrax are saved. Use the edit boxes to change the file paths as needed, or click the ??? button on the right to pop up a ?Browse For Folder? dialog box, which allows you to pick a different location.
Under Additional Options, there is a check box that toggles the Auto-play feature. If checked, audio files are automatically played when dragging them over SlideTrax or when browsing for them.
Click OK to save all the Options. If one of the File Locations is not found on the computer, SlideTrax pops up a message box that tells you about the problem.
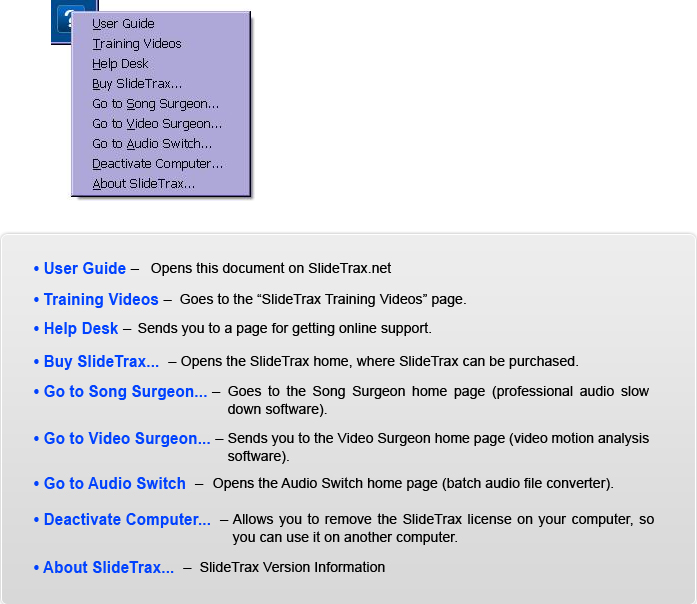
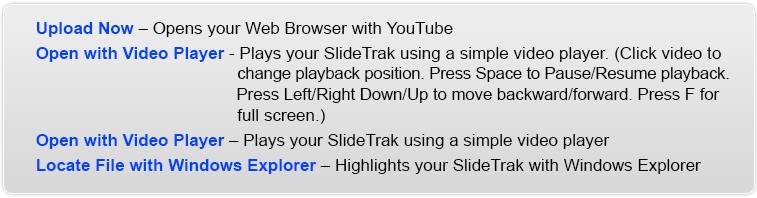
Help
When you click the Help (?) button, a menu appears with these options: